Showing posts with label craft. Show all posts

Tuesday, 16 October 2012

Stain Glass Windows

A great activity for the start of Spring/Summer with daylight savings providing more light! If you are in the northern hemisphere save this one for six months.

Materials Needed

  • Cellophane - Different colours
  • Coloured paper
  • Scissors
  • Glue
  • Markers

Method

  1.   On your piece of coloured paper draw some random shapes. Make sure these shapes are easy to cut out and are spaced evenly apart.
  2. Cut out your shapes.
  3. Using the cellophane cover and glue over the cut outs.
  4. Hang it up on a window that gets plenty of sunshine.
Front

Back

Desired Effect


Thursday, 27 September 2012

Toilet Roll Space Ship

Materials
  • Aluminium Foil
  • Toilet Roll
  • Glue
  • Paper- Coloured
  • Markers/Pencils
  • Cardboard from cereal box
Method

  1. Cut out wing flaps, these will go on the sides of the rocket, from the cereal box card. Also make a cone to go on top from the same material.
  2. Cut slits on the toilet roll to fit the wing flaps into.
  3. Cover the wing flaps, the cone cover and the toilet roll in aluminium foil.
  4. Make sure you cut the aluminum covering the slits in the toilet roll before you insert the wing flaps.
  5. Decorate with windows and rocket fire.


Wednesday, 1 August 2012

Snowman and other wintry scenes

Materials Needed
  • Cotton Balls
  • Glue
  • Coloured Paper
  • Scissors

Method
  1. Using the cotton balls make the shape of a snowman. Three circles;biggest on the bottom and smallest on the top.
  2. Glue these down.
  3. Using coloured paper cut out some arms, facial features and add detail to the back ground if you wish.
  4. You can also create other snow scenes with the cotton wool as it can stretch out.


Monday, 30 July 2012

Planet Mobile

This activity is a great way to learn about the planets, their colours and their order.


Materials Needed

  • Planet printout (Get it here)
  • Scissors
  • Glue
  • String
  • Coloured Paper
  • Colour pencils
  • Two Popsicle sticks

Method

  1. Glue the two Popsicle sticks together to form an 'X' and put it to the side to dry.
  2. Colour in all the planets with your pencils, I would suggest to not use markers as it can make it difficult to cut out.
  3. Cut out the planets.
  4. When the planets have been cut out trace them on the coloured paper, this will be on the back of the planet, and cut these out.
  5. Attach a length of string to each spoke of the 'X' you made earlier.
  6. Attach the planets to the string by gluing the string in between the planet and coloured card cutout. 
  7. You can also cut out the names of the planets and glue on the coloured card as well.
  8. You can add sequins or colourful cotton balls or just glittery stuff in general to make the whole thing feel a bit more spacey.


Wednesday, 25 July 2012

Shooting Stars

This is a good activity to get kids running around.

Materials Needed
  • Thick cardboard
  • Tissue paper - Lots of different colours.
  • Popsicle sticks
  • Glue
  • Sequins
Method
  1. Printout a Star and trace it on some cardboard. Make sure you use good scissors to cut out the star or it will be near impossible.
  2. Using your sequins and whatever you can find lying around decorate the star to be as spacey or glittery as possible.
  3. Using the tissue paper cut nice long strips of different colours and attach them to the back of the star.
  4. Attach the Popsicle stick to be used as a handle.
  5. Tell the kids to run around!


Thursday, 21 June 2012

Sand Art

We did a theme week on deserts and one fun and successful activity was sand art. It's a great way to add some texture to kid's work. It can get a bit messy but nothing a vacuum cleaner can't handle. We did desert landscape pictures


Materials

  • Sand
  • Glue sticks
  • Coloured paper
  • Scissors

Method

  1. Using colours like yellow, orange and red create a desert scene.
  2. Apply glue to where you want your sand to stick. I think it is better to limit the area where you stick sand as it creates a better effect, but if they want to do more that's all good too.
  3. Quickly sprinkle sand on the glued areas and rub it in to make sure you get enough sand to stick.
  4. Shake off the excess into your sand tub, or if you are a child the table or floor.
  5. Stick on some detail such as cacti, camels, clouds or birds. Make it geographically specific to your area, if you live in a country with desert that is.

This one reminds me of the edge of Sahara, a massive dune looms in the distance.


Some of the kids decided that they didn't want to do deserts and wanted to do beaches instead. 


Thursday, 14 June 2012

Mosaics

Mosaics are a fun and creative craft that allows kids to do what ever they want be that a picture or a pattern.


Getting the right materials can be tricky. You can make your own which would be time consuming or you can buy little crafts squares from your local art and craft shop. 


Materials

  • Coloured Squares
  • Glue
  • Coloured Paper
Here are some examples of what we did:

Boat

Flower

Girl

Creature from Minecraft

Wednesday, 13 June 2012

Trojan Horse

We have been exploring the ancient world for the past couple of weeks at work and I just wanted to share this activity with you. It is not mine but I think i is an excellent activity. 


For the template and instructions click here


Here is a picture of some we did:


When we did it we just glued coloured card on the back, it might be  good idea to use thick cardboard for the wheels or it just continually falls over.

Friday, 18 May 2012

Felt Animals

Felt Animals

This is a good activity for children if you a learning about a particular country and their native animals or you are learning about types of animals such as mammals, reptiles or birds.

Materials Needed

  • Different coloured felt, fabric or paper.
  • Glue
  • Scissors
  • Animal outline or colouring pages.
Method

  • Using the felt pieces or scrap fabric cut into different shapes to fit on animal
  • You can either stick with how the animal is coloured like a Tiger or Zebra.
  • Or you can make colourful new animals.
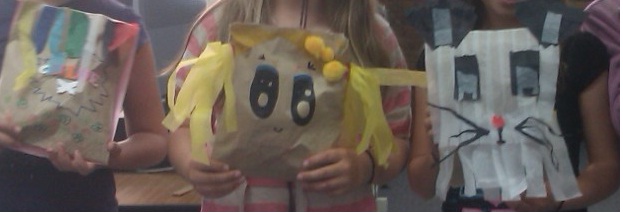
This example has used corrugated card for the animal and felt for the scene.


Thursday, 17 May 2012

Box Masks

Box Masks

Materials Needed

This one may need a little planning. If you are working at a child care center or after school care that does big orders once a term or every six weeks or so much sure you save all your boxes. While this means that your office or work space may become cluttered it is worth it in the end.  You can either make it free art or define it with a theme such as robots.

  • Big Boxes
  • Glue
  • Scissors
  • Markers

Method

  1. Let the kids know what you expect of them, whether the activity is free o defined.
  2. Let them go!
  3. You may need to make sure some children aren't greedy though.

Tuesday, 15 May 2012

God's Eye

God's Eye


This one is not something I have made up but it is a great activity for children, especially on a rainy day.

For full instructions go here:

Here are some that the children made the other day


Monday, 14 May 2012

Cactus Flower

Cactus Flower

Materials Needed

  • Polystyrene Bell Shape
  • Green, Yellow and Red tissue Paper
  • Match Sticks
  • Scissors
  • Glue
Method

  1. Cut the green tissue paper in to small sections and glue on to polystyrene bell shape.
  2. Wait until dried
  3. Stick in match sticks
  4. Create a flower to be placed on top. There are many ways to do this so have a couple of tries and see what woks best for you.
If you cannot find a polystyrene bell shape I think this could work well with just a toilet roll. It may be a bit harder to insert the match sticks, use a pin to create a hole first.


Wednesday, 9 May 2012

Paper Bag Piñatas

Paper Bag Piñatas

Materials Needed

  • Paper Bag
  • Tissue Paper
  • Markers
  • Glue
  • Scrap Paper
  • Lollies (Candy)

Method

  1. Using tissue paper and markers design a character or a theme for your Piñata. This could be an animal, favourite TV character, country, sports team or best friend.
  2. Fill the bag with scrap paper to make is full and add lollies (candy) as the prize. It doesn't necessarily have to be food it could be toys as well.
  3. Tape up the paper bag when finished and attach some string to the top.
  4.  Hang it up and have fun!